
Windows: skjul filer og mapper
På flerbrukersystemer som Windows, kan det være nødvendig å skjule mapper og filer for å forhindre at andre brukere får tilgang til dem.
Skjul filer og mapper raskt
Den enkleste løsningen er å stille inn den såkalte skjulte attributtet.
- For å gjøre dette, høyreklikk på den aktuelle filen eller mappen og gå til "Egenskaper".
- Merk av i ruten ved siden av "Skjult" og bekreft med "Bruk".
Skjul filer og mapper trygt fra bestemte brukere
Dessverre kan tiltaket som er nevnt ovenfor enkelt omgås av enhver bruker, siden filutforskeren tilbyr muligheten til å vise skjulte filer eller mapper. Med følgende instruksjoner kan du regulere tilgangen mye mer effektivt. Slik fungerer det:
- Bare flytt filene og mappene som skal gjemmes i en kollektiv mappe, hvis tilgang du kan regulere.
- Høyreklikk nå på mappen og velg alternativet "Egenskaper" fra hurtigmenyen.
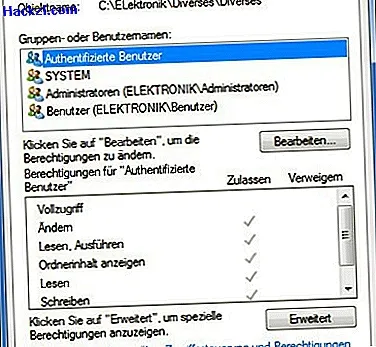
- I fanen "Sikkerhet" ser du brukergruppene under "Gruppe og brukernavn". Hvis du klikker på en spesifikk, kan du se hvilke rettigheter brukeren har i ruten nedenfor.
- Du kan nå opprette en ny bruker hvis rettigheter du vil begrense eller tilbakekalle en eksisterende.
Legg til brukere hvis tilgang du vil begrense
Hvis du vil bestemme en ny bruker, fortsetter du som følger:
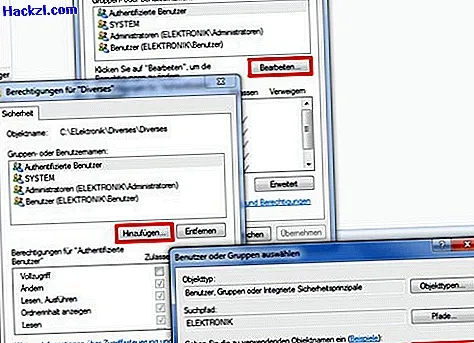
- Klikk nå på [Rediger] -knappen og deretter på [Legg til] -knappen.
- I vinduet "Velg brukere eller grupper" skriver du inn brukerens navn, for eksempel "Sven", og klikker deretter på [Kontroller navn] -knappen og deretter på [OK] -knappen.
Opphev brukernes rettigheter til mapper og filer
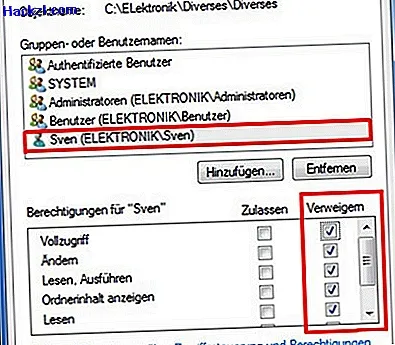
- Brukeren "Sven" er nå på listen som du allerede kjenner fra punkt 1. Merk nå brukeren "Sven" ved å bare klikke på navnet hans.
- I det nedre vinduet "Autorisasjoner for 'Sven'" kan du nå se gjeldende autorisasjonsinnstillinger. For å fjerne all tilgang til katalogen fra Sven, klikker du i "Avvis" -kolonnen i avkrysningsruten "Full tilgang" og bruker deretter innstillingene ved å klikke på [Bruk] -knappen.
- For å trekke tilbake tilgangen til andre brukere, klikker du bare på [Legg til] -knappen igjen og begynner igjen med trinn 2.
- Klikk på [OK] -knappen hvis du ikke vil legge til flere brukere eller grupper på listen.
Vær oppmerksom på at tildelingen av rettigheter under Windows er mye mer komplisert enn vist i dette lille eksemplet. Enhver bruker med administratorrettigheter kan angre innstillingene som er spesifisert ovenfor, men dette gjelder alle innstillinger. For eksempel, hvis du vil sette opp restriktive rettighetsoppdrag i et lite bedriftsnettverk, er det viktig å håndtere dette emnet mer intenst.
Les hvordan du beskytter en mappe med passord i Windows 7 her.